Wednesday 26 April 2023

How to Clean Toilet Bowl Stains (Like A Pro!)

Cleaning the bathroom is almost no one’s favorite task, and that is usually because no one enjoys cleaning toilets. We get it, toilets are gross and often hotbeds for bacteria, but that really means that they need to be cleaned more often than basically anything else in the home.


Sometimes, no matter how often or how vigorously you scrub, there can still be some residual stains in the toilet bowl. But don’t worry because, most of the time, those stains aren’t actually your fault.


So where do those stains come from, and how are you supposed to get rid of them without completely ruining both your toilet and pipes? Lucky for you, we have an explanation and several solutions.


Below, we’ll tell you about the different stains you may find in your toilets and also guide you through the safest and most natural ways to clean a variety of stubborn stains from your toilet bowl. With a little patience and some elbow grease, your toilets will be clean and stain free in no time.


What Creates Toilet Bowl Stains?


There are actually a number of sources for different types of toilet bowl stains. The best way to treat the stains in your toilet is to learn what causes toilet stains of all kinds. Not all stains are created equally, which means they can’t all be removed in the same ways.


Before diving into how to clean toilet bowl stains, let’s learn about at what causes them. Once you know what you’re dealing with, it’ll be easier to find the right stain remover and even prevent stains in the future.


Mineral & Hard Water


Mineral and hard water stains are easily the most common stain you will find inside your toilet bowl. These are so common because of the high amounts of particular minerals like calcium, limescale, and magnesium found in your home’s water.


Over time, these minerals can leave yellowish and brownish deposits and rings in your toilet. You can actually prevent future stains and potentially reduce damage to your water pipes by installing a filter to eliminate pollutants.


Rust


If you notice darker brown or red toilet bowl stains, the source could be corroded pipes which can contaminate the water and add high levels of iron to your home’s water. Unlike lighter mineral stains, you might notice rust stains earlier on because the deeper red color stands out against white porcelain toilets.


Rust is also corrosive and hard to remove red buildup and a chemical reaction, iron oxide, can wreak havoc on your toilet bowl. But even if you’ve been putting it off for a while, removing rust stains isn’t impossible.


Copper


These stains can appear similar to rust stains in color, if not slightly lighter. Copper can make water highly acidic and your toilet is unfortunately where it accumulates. Getting rid of copper stains can be fairly easy, but without fixing the source of the problem, they’re just going to return.


If you have copper water pipes and notice copper stains, the problem might be pipe corrosion and you may need to fully replace the pipes at some point. However, if the problem is acidic and coppery water, you can install a filter that cleans the water coming into your home


Mold


Stains on tubs, sinks, and toilets from mold look gross and can have truly nasty effects on your overall health. Mold stains are super easy to spot because of the dark green and black spots. Even if you don’t see mold, you’ll likely notice the musky, unpleasant odor coming from your toilet.


If you find any of those nasty mold stains in your toilet bowl, it’s super important to treat and remove the mold as soon as possible. As soon as you’ve cleaned up the stains, you can keep mold and mildew at bay by making sure your bathroom is well-ventilated, especially after bathing or showering.


How to Clean Toilet Bowl Stains the Right Way


how to clean toilet bowl stains open bathroom doors


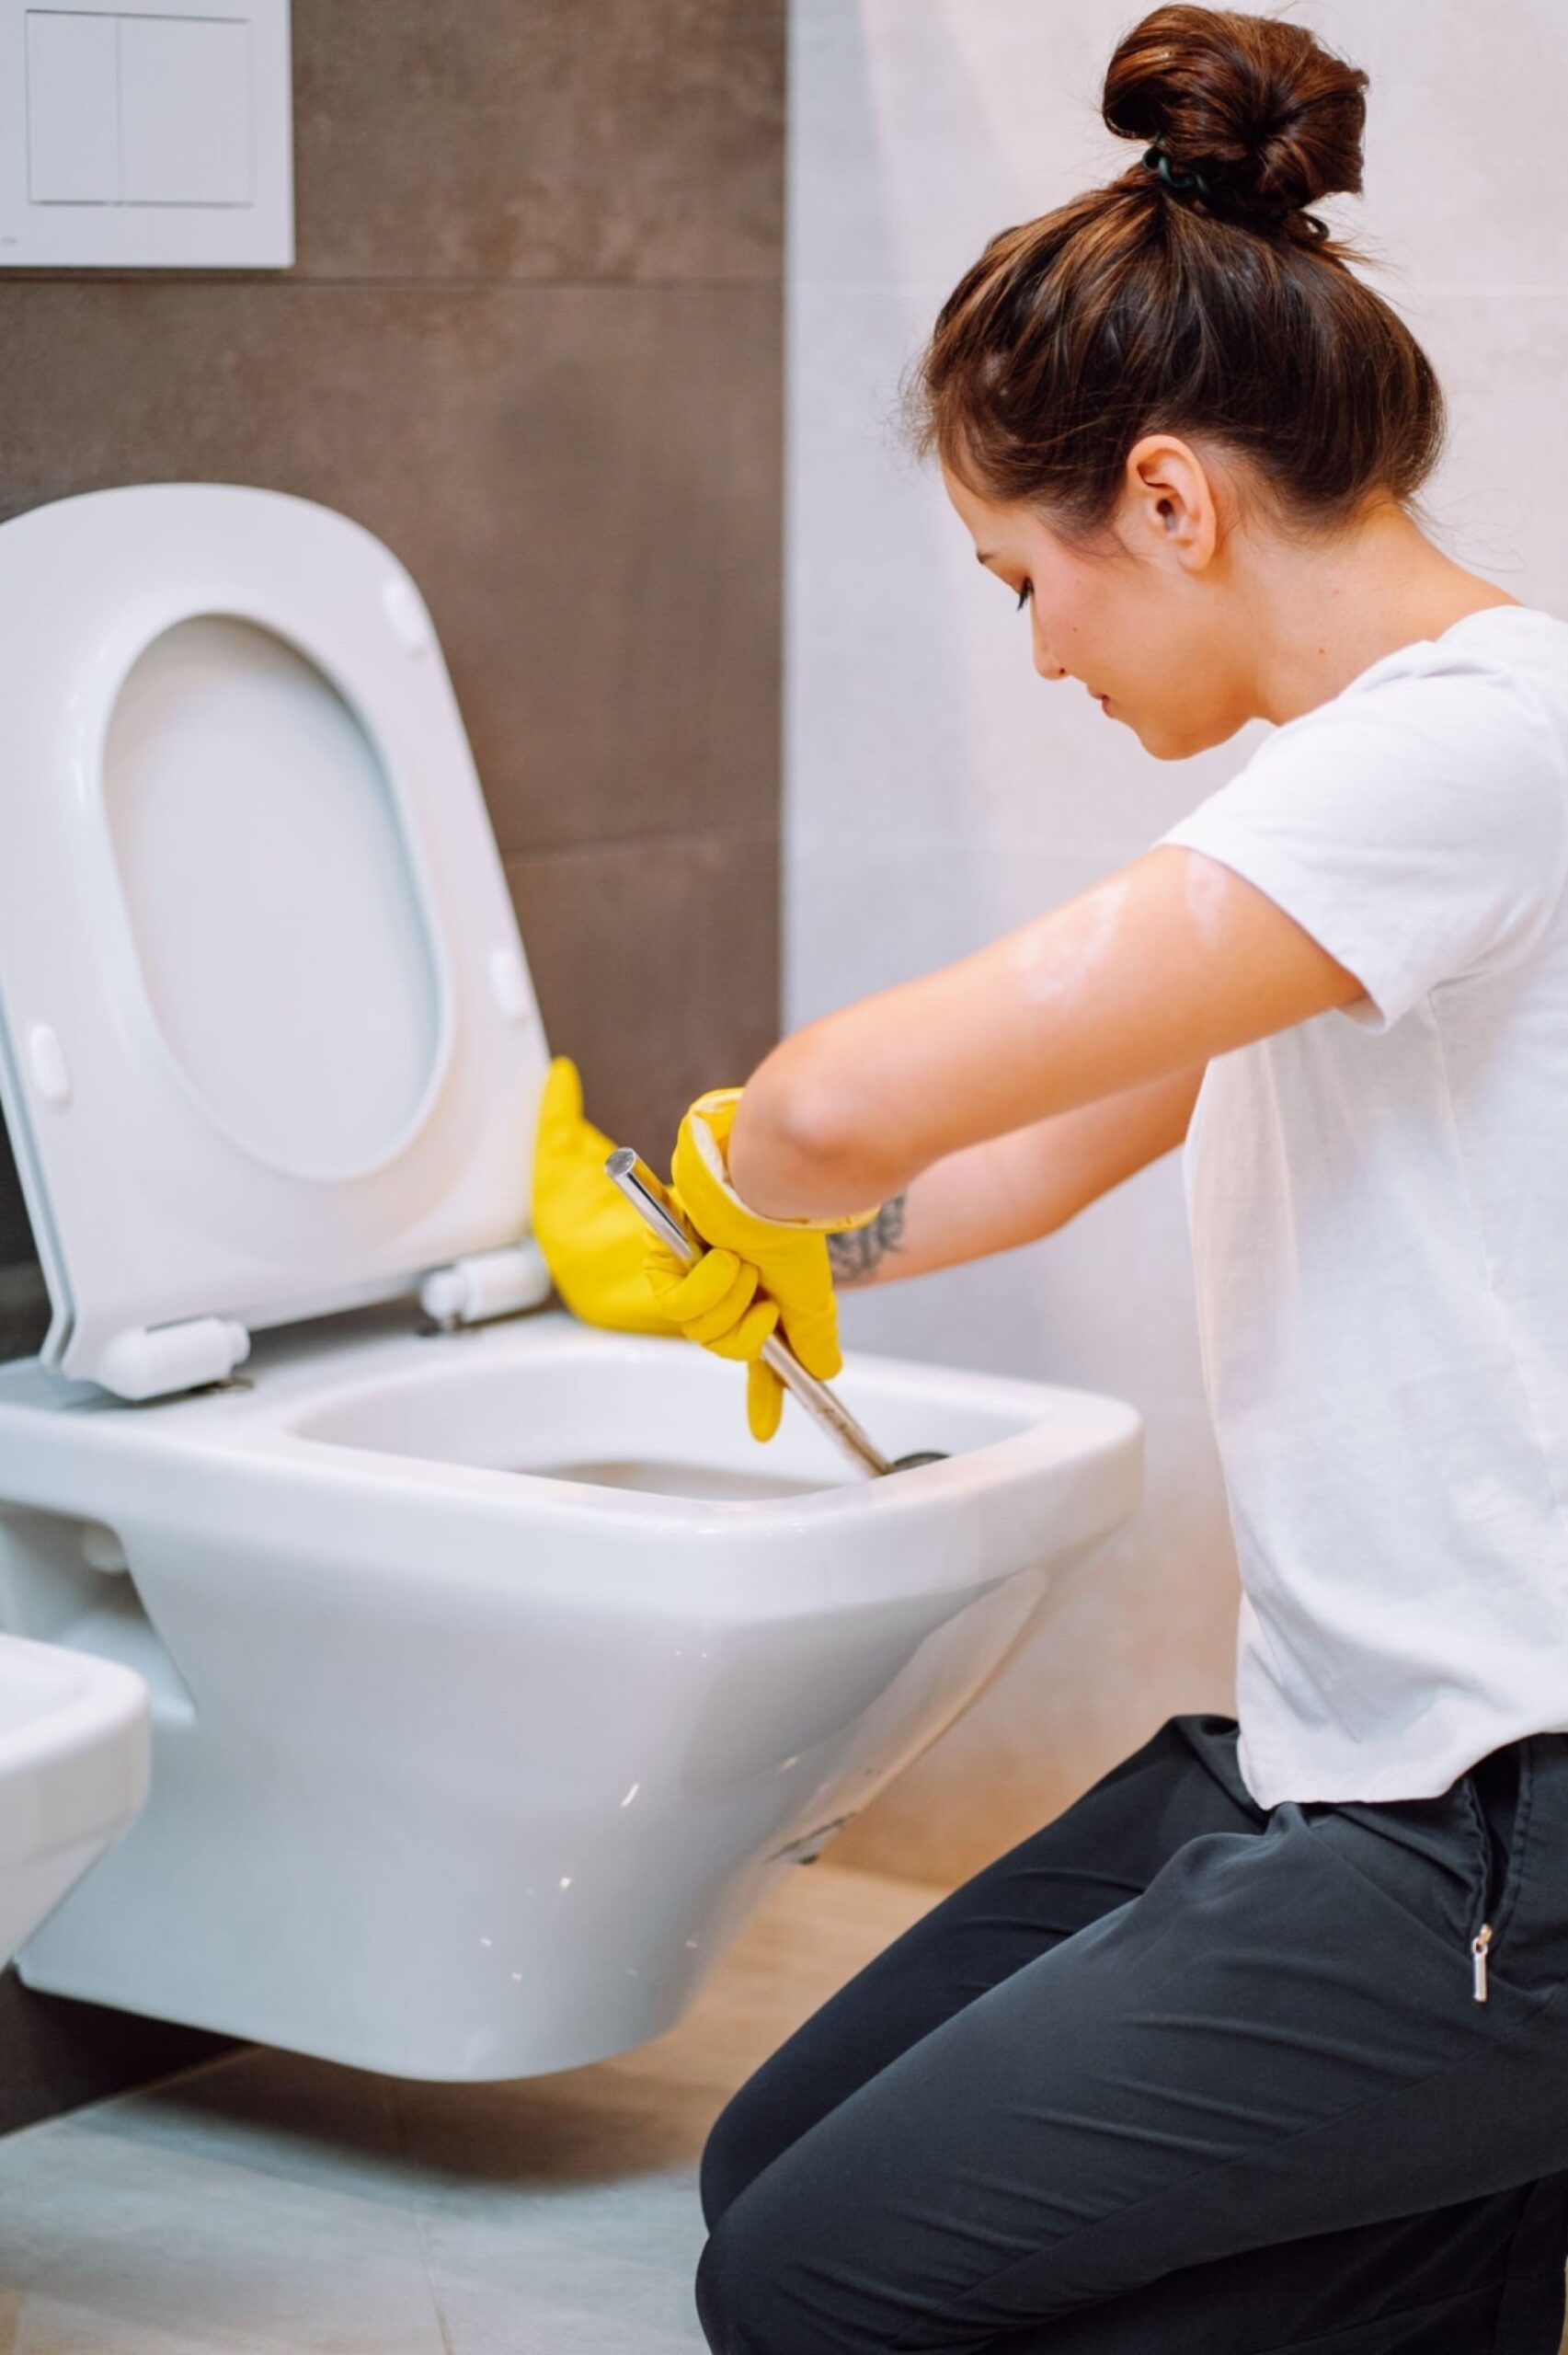
Even though the stains in your toilet might seem like they’ll require some of those industrial-strength cleaners, you can and should clean them as safely as possible. Cleaning toilets safely and naturally is always the best course of action for the sake of your home’s pipes as well as for the sake of your family.


But before you set out on your cleaning mission, you should always make sure you and your bathroom are prepared for action. Here are a few things to remember before getting started:

  • Turn off the water flow to your toilet and flush it before applying any cleaning products, this will ensure that your toilet bowl is fully exposed to be cleaned.
  • Make sure you have and wear protection like eyewear, gloves, and a mask before you clean your toilet, especially before dealing with any mold.
  • Open a window and or turn on your bathroom’s fan or vent to ensure that the space is well-ventilated and you have direct access to fresh air.
  • Give your toilet a good scrub with your toilet brush to help loosen up some of the more stubborn stains and grime before settling in to clean them directly.

To find out what kind of natural and safe stain removal methods work best for the stains in your toilet, keep reading and review the cleaning guide below.


Lemon Juice


Best for: Hard water, mineral, and mold stains


Not only does lemon juice smell great, but it can also whiten and brighten while breaking down stains. The acidity found in lemon juice works well to dissolve mineral deposits and the antifungal properties can kill mold, making lemon juice ideal for treating stains in your toilet. Here is how to use lemon juice properly:

  • Pour about 1 cup of lemon juice and ½ a cup of water into a spray bottle and mix them together.
  • Spray the lemon juice and water around the entire surface of the toilet bowl including the lip of the seat.
  • Allow the spray to sit in the toilet bowl for about half an hour and spray a little more if needed before continuing.
  • Use your toilet brush to scrub the whole toilet bowl vigorously to remove any stubborn stains.
  • Once the surface of the bowl is clean and clear of stains, turn the water back on and flush the toilet to clear the lemon juice.

With a bit of elbow grease and patience, your toilet should be clean and free of stains while also smelling delightfully lemony fresh. However, if your toilet still has stains after using lemon juice, don’t be discouraged. There are still several methods to use to treat and remove any stains


Coca-Cola


Best for: Hard water and mineral stains


Turns out Coke isn’t just our favorite soda (sorry Pepsi fans!) but is also a pretty effective cleaner. In theory, it actually works similarly to vinegar when cleaning. This is likely because of its pH level, which is reported to be 2.6 to 2.7, due to H3PO4 or phosphoric acid within it. Here is how to use Coca-Cola to clean your toilet:

  • Carefully pour a full 16oz bottle of Coke around the surface of your toilet bowl.
  • Leave the soda to sit on the surface for several hours, for best results we suggest leaving it overnight.
  • Once the soda has been allowed to sit for some time, use your toilet brush to thoroughly scrub the toilet bowl clear of stains.
  • Once scrubbed clean, turn the water back on and flush your toilet to clear the Coke from the bowl.

Remember, if this doesn’t do the trick, there are still more methods to put to use so keep reading to find your next move.


White Vinegar & Baking Soda


Best for: Hard water, mineral, rust, copper, and mold stains


If you’ve read any assortment of cleaning blogs, you know this partnership of products is recommended for everything from stain removal to disinfecting. Distilled white vinegar is a natural cleaner, disinfectant, and fungicide, and baking soda is a natural deodorizer, whitener, and mild abrasive. Here is the best way to use these two products to clean stains in your toilet:

  • Sprinkle a generous amount of baking soda around the surface of the toilet bowl and use your toilet brush to scrub the surface and make a paste from the baking soda and the very small amount of water still in the bowl.
  • Let this paste sit in the bowl for about 10 to 20 minutes before continuing to the next step.
  • Once the paste has been allowed to sit for some time, carefully pour about 2 cups of vinegar around the bowl and then close the toilet lid.
  • Allow the vinegar and baking soda paste to react and sit in the toilet for about half an hour before reopening and scrubbing the bowl vigorously.
  • As before, once the toilet has been scrubbed well you can turn the water back on and flush the toilet to clear the remaining vinegar and baking soda.

This method is almost always effective on the first round, but don’t be afraid to repeat the process in order to treat more stubborn stains and residue. Vinegar on its own is a strong and effective cleaner, so you can also use it alone to clean and disinfect.


Hydrogen Peroxide


Best for: Hard water, mineral, and mold stains


You might not think to check your medicine cabinet for a handy household staple, but hydrogen peroxide is about as safe and natural as possible when it comes to house cleaning. It’s perfect for treating mold, hard water, and other stains within your toilet. The punch of hydrogen peroxide packs can clean stains and kill germs, leaving your toilet clean and healthy. Here’s how to safely use hydrogen peroxide to clean stains from your toilet:

  • Pour about ½ to 1 cup of hydrogen peroxide around your toilet bowl and allow it to sit for half an hour.
  • Once it has had time to work, use your toilet brush to scrub the toilet bowl vigorously.
  • If there are stubborn stains that haven’t been removed by the hydrogen peroxide alone, sprinkle a small amount of baking soda directly onto the stain and scrub the bowl until it is clear.
  • After scrubbing, turn the water flow back on and flush the toilet to clear away the hydrogen peroxide.


Pumice Stone


Best for: Rust and copper stains


Pumice stones, often sold as scouring sticks, are usually either a tried and true solution or a last-ditch effort for stain removal. These work best against the toughest and most stubborn stains, but can permanently scratch your toilet’s porcelain finish. Be sure to keep both the scouring stick and the toilet bowl wet to help avoid scratches.


Did any of these methods help you to flush away the stubborn stains in your toilet? Have you tried any other methods that you’ve found to be effective and handy in your home? Tell us about your experiences, tips, and tricks in the comments below! We love hearing from you (Just be sure to keep the toilet humor to a minimum)!


If you’re looking for more cleaning hacks and how-to guides, check out our blog to read up on how to clean basically everything in and around your home. Looking for less DIY and more SOS? Take a step back and let Cleanzen clean up around your home! Our friendly and affordable cleaners are here to help, so contact us today to find out how we can help you keep your home happy and healthy all year long.

The post How to Clean Toilet Bowl Stains (Like A Pro!) appeared first on Cleanzen.

from Cleanzen https://cleanzen.com/blog/how-to-clean-toilet-bowl-stains/
via IFTTT

from Cleanzen Cleaning Services https://cleanzencleaningservices0.blogspot.com/2023/04/how-to-clean-toilet-bowl-stains-like-pro.html
via IFTTT

from
https://cleanzencleaningservices0.wordpress.com/2023/04/27/how-to-clean-toilet-bowl-stains-like-a-pro/

from Gabriela Bragg https://gabrielabragg.blogspot.com/2023/04/how-to-clean-toilet-bowl-stains-like-pro.html
via IFTTT

from Gabriela Bragg https://gabrielabragg.wordpress.com/2023/04/27/how-to-clean-toilet-bowl-stains-like-a-pro/
via IFTTT

from Emilio Butler https://emiliobutler.blogspot.com/2023/04/how-to-clean-toilet-bowl-stains-like-pro.html
via IFTTT

from
https://emiliobutler.wordpress.com/2023/04/27/how-to-clean-toilet-bowl-stains-like-a-pro/

from Cindy Roberts https://cindyroberts0.blogspot.com/2023/04/how-to-clean-toilet-bowl-stains-like-pro.html
via IFTTT


from
https://cindyroberts00.wordpress.com/2023/04/27/how-to-clean-toilet-bowl-stains-like-a-pro/

Wednesday 19 April 2023

12 Ways to Combat Allergens Around Your Home

Warm weather is finally upon us, unfortunately that almost always means allergies. If you’ve found that there’s no escape from your symptoms, the air in and around your home might be to blame. Keep reading to find out what has been making your sniffling worse and how to keep your family happy and healthy this allergy season.

What Causes Allergies?


The warm, sunny weather of spring brings on the never ending sniffles and watery eyes that seem to plague everyone each year. But what exactly causes those pesky flareups every time the pollen count increases? Allergies are your body’s reaction to a foreign particles in the air called allergens. If you have an allergy to a particular allergen, like seasonal pollen, dust and dander, your immune system overreacts to its presence and brings on symptoms like hay fever and even anaphylaxis in some cases.


Reducing Allergens at Home


So when it comes to those annoying airborne allergens, how can you manage and minimize their effects when you’re indoors? Keep reading to see what tips you can use around your home.


1. Vacuum Every Week


Making sure you vacuum as a part of your regular cleaning schedule can make a huge difference, especially during peak allergy seasons. Even if you already make sure to vacuum semi-regularly, you may want to increase the frequency to keep allergens under control. We recommend thoroughly vacuuming once or twice each week to reduce the allergens that may collect around the house. Be sure to focus on carpeted floors and upholstered furniture all over the home as fabric can trap and hold onto allergen particles extremely easily. Be thorough and remember to clean and change out your vacuum’s filter to make sure that it is just as effective each time you use it.


2. Dust the Home Efficiently


Much like vacuuming, regular dusting can make a noticeable difference in the effects of allergens within your home. You should also make sure to dust your home several times each week in order to catch and remove any allergen accumulations. When you dust, move from top to bottom so you can avoid spreading dust around clean surfaces. Avoid using a feather duster or cloth and instead opt for a damp microfiber cloth. Microfiber can more effectively trap dust within the fibers instead of simply moving it around. Pay extra care to remember to clean and dust ceiling fans, blinds, curtains, and light fixtures.


3. Clean & Replace Air Filters Regularly


Woman cleaning an air purifier filter


Warmer weather means finally switching on your home’s AC unit of central cooling system and starting to circulate that wonderful cool air. The only issue is that you could be circulating allergen filled air around your home. Be sure to also check to see if your unit or system uses permanent or disposable filters so that you know exactly how to clean them or which type of filter you’ll need to purchase when you replace them. We highly suggest replacing any filters within your home as soon as the weather changes and also making sure to clean the filter a few times each month. Check the manufacturer’s instructions when cleaning and replacing any and all filters around your home.


4. Leave Shoes & Outerwear at the Door


In order to avoid bringing all those pesky outdoor allergens into your home, you’ll need to take some preventative measures. Here are a few ways to stop allergens at the door:

  • Make sure you have a mat both inside and outside the entryways around your home and remember to wipe your shoes before and after entering.
  • Take your shoes off after entering the home and consider implementing a no-shoes policy to avoid guests and residents from tracking allergens around the house.
  • If you are wearing any outerwear when you enter the home, make sure to remove it at the door and wash it regularly so that you can prevent the spread of allergens.
  • Keep your front and back patios clean and swept to keep the amount of pollen that accumulates on the surfaces just outside your home under control and reduces the amount of allergens that enter your home.


5. Reduce Clutter Around the Home


Cute happy little girl embracing teddy bear.


One of the best ways to keep dust accumulation under control around you home is by minimizing the clutter. The more surfaces that are created around the home, the more spaces dust, dander, and pollen particulates have to settle and accumulate. Not only is this a good way to minimize the dust around you home, it also leaves your home looking and feeling fresh and clean. Make sure items that collect dust easily like knickknacks, tabletop ornaments, books and magazines are put away in their proper places. Get the kids involved by having them clean up and put away toys, games and stuffed animals.


6. Wash All Linens Regularly


As you clean and straighten up around the house, don’t forget to freshen up the linens in each room. Regularly wash and change out towels, bedding, pillows, and throw blankets around the house. Bedding specifically can accumulate dust mites and other nasty particulates very easily, so when you wash and change your sheets and blankets, take some time to also clean and deodorize your mattress and pillows before replacing any and all covers. If you’re interested, there are also many varieties of dust-proof and hypo-allergenic sheets and bedding on the market for you to consider switching to to better manage your allergies as you sleep.


7. Keep Windows & Doors Sealed


The urge to open up the windows around your home to let in fresh air as the weather warms up can actually cause more harm than good for those with allergies. Unfortunately, by flushing the stale winter air from your home through open windows, you are opening your home to pollen and dander from the outside. Those lovely cool breezes through the windows can also stir and kick up the dust around your home and carry it all throughout your home. Rather than opening up the windows and doors to bring in pollenated air, switch on your AC and make sure the filters around your home are clean. This way you’ll be able to circulate fresh air and also remove airborne particulates at the same time.


8. Wash Your Hands & Face


Little girl washing hands with water and soap in bathroom


You may already notice that your allergies have started to become more and more of a problem and you find yourself struggling with the classic symptoms of runny nose and eyes. With every wipe of the nose and eyes, you may actually be making your situation worse. To best keep your symptoms under control and skin clear of allergens, remember to regularly wash your face and hands. Our hands can transfer those problematic particles easily to our faces and the rest of our body so the best solution to this is the most obvious. Wash your hands frequently and remember to keep your hands away from your face so that you don’t add to your already sensitive sinuses.


9. Invest in an Air Purifier


If you’re waking up congested and find that your symptoms never improve, but you might want to take things to the next level with an air purifier. The right purifier can make a substantial difference in the air quality around your home. When you’re looking for a good air purifier, check for a high “Clean Air Delivery Rate” or CADR. A HEPA filter is a must for air purifiers as they been around since the 50s and have been shown to trap those annoying microscopic allergens. You should also make sure you purchase a device that can handle the size of the room you’ll be using it in. All you have to do is turn the device on and leave it to do its thing.


10. Keep Furry Friends Groomed


Woman using a comb brush the Persian cat


Our pets are beloved members of our family, and they love getting some fresh outdoor air just as much as we do. The only issue is that they always seem to be magnets for dander and pollen to catch onto and accumulate. The best and only way to keep our furry friends from bringing in their collection of allergy inducing particles is by keeping them clean. Regularly grooming and brushing our pets is one of the most effective ways to keep the dander and pollen they collect and produce under control. There are even a variety of dander reducing shampoos and sprays that you can use to keep your pets from making your allergies worse.


11. Manage the Humidity Within the Home


Turns out hot and humid homes can be breeding grounds for dust mites and mold. Both of these can add to and worsen your allergies and symptoms. To keep you home as free from these harmful particulates as possible, try to maintain your home’s temperature between 68° F and 72° F. You should also keep the relative humidity within your home no higher than 50% in order to keep mold from forming around the house.


12. Clean & Dust Curtains & Blinds


woman removing dust from window blinds


Many of us can forget that curtains and horizontal blinds need just as much attention when cleaning as the rest of our home. In fact, because they are so close to the windows, they can accumulate dust and pollen particles more easily than other surface around your home. If you struggle to keep up with dusting your horizontal blinds, consider replacing them with washable roller-type shades. You may also want to look into switching to washable curtains made of plain cotton or synthetic fabric rather than your regular upholstery curtains and trim.


Leave your tips and suggestions for reducing allergens in the comments below, we love hearing from you! For more tips and trick for keeping your home clean, and to find out how our friendly cleaner can help, check out cleanzen.com/denver.

The post 12 Ways to Combat Allergens Around Your Home appeared first on Cleanzen.

from Cleanzen https://cleanzen.com/blog/reduce-allergens-in-home/
via IFTTT

from Cleanzen Cleaning Services https://cleanzencleaningservices0.blogspot.com/2023/04/12-ways-to-combat-allergens-around-your.html
via IFTTT

from
https://cleanzencleaningservices0.wordpress.com/2023/04/19/12-ways-to-combat-allergens-around-your-home/

from Gabriela Bragg https://gabrielabragg.blogspot.com/2023/04/12-ways-to-combat-allergens-around-your.html
via IFTTT

from Gabriela Bragg https://gabrielabragg.wordpress.com/2023/04/19/12-ways-to-combat-allergens-around-your-home/
via IFTTT

from Emilio Butler https://emiliobutler.blogspot.com/2023/04/12-ways-to-combat-allergens-around-your.html
via IFTTT

from
https://emiliobutler.wordpress.com/2023/04/20/12-ways-to-combat-allergens-around-your-home/

from Cindy Roberts https://cindyroberts0.blogspot.com/2023/04/12-ways-to-combat-allergens-around-your.html
via IFTTT


from
https://cindyroberts00.wordpress.com/2023/04/20/12-ways-to-combat-allergens-around-your-home/

Wednesday 12 April 2023

How to Properly Clean Your Kitchen Sponge

Sponges are a key utensil that nearly everyone has in their kitchen. They do the job of cleaning our dishes and wiping up any assortment of messes around the kitchen. But did you know that the thing that does the cleaning also needs to be cleaned?


Doing the dishes with the same dirty old sponge you toss in your sink between uses can actually do more harm than good. Below, we’ve compiled a few of our go-to methods for both keeping your kitchen sponge clean and killing the bacteria within it. Keep reading to find out just how easy the process can be.

Why Should You Clean Your Kitchen Sponge?


Kitchen sponges, while meant to clean, require fairly frequent cleaning themselves. But why is that? The pores within sponges can very easily trap and hold onto moisture and food debris, and this can breed bacteria and germs. Sponges require regular cleaning and disinfecting in order to kill the bacteria that can grow within them. Without cleaning them, when you use your kitchen sponge to clean your dishes and countertops and stove, you are spreading the bacteria and germs within the sponge. So how do you keep those cleaning utensils clean?


The Best Ways to Clean a Sponge


rinsing sponge under kitchen faucet


Below you’ll find a handful of methods you can pick and choose from to keep your kitchen sponge clean and sanitized between uses. Keep reading and try them for yourself to see what works in your home.


1. Vinegar

One of the best and most effective ways to clean and disinfect your kitchen sponge is by using household white vinegar. This method is super simple but effective! Here’s what to do:

  • Fill a bowl with undiluted distilled white vinegar and then submerge your kitchen sponge in the bowl.
  • Allow your kitchen sponge to soak in the vinegar for 5 to 10 minutes to clean, disinfect, and deodorize.
  • Once your sponge has been left to soak, remove it from the vinegar then rinse it under hot water and wring it out. Leave it to dry for a few hours before using it again around your kitchen.


2. Bleach

If you’re looking for a more heavy-duty method for cleaning and disinfecting, bleach is the key. This is the best way to kill mold, bacteria, and mildew hiding in your sponge. Here’s how to create and use a bleach solution to clean your sponge:

  • In a bowl, mix together 1 quart of hot water and ½ a teaspoon of bleach.
  • Submerge your kitchen sponge in the solution, and allow it to soak for 5 to 10 minutes. This will allow the bleach time to disinfect and kill bacteria within the sponge.
  • After the sponge has had time to soak, remove it and rinse it under hot water. Wring it out and allow it to fully dry before using it again.
    Note: Vinegar and bleach both have very strong and pungent odors. Please make sure that when you use either of these methods that you do so in a well-ventilated area and protect your airways during the cleaning process.


3. Microwave


A sponge inside the microwave


When you want to clean and disinfect your kitchen sponge, but maybe want to skip the chemicals in the process, turn to your microwave. Heat alone can kill more bacteria than you might think, so here’s how to do it:

  • Thoroughly and completely soak your kitchen sponge in warm water. Never put a dry sponge in the microwave, this is an easy way to start a fire!
  • Place the wet sponge either on a plate, or in another shallow container with a small amount of water.
  • Set your microwave timer for 5 minutes and start microwaving the sponge.
  • Once the microwave has finished, take the sponge out and allow it to cool for 10 to 15 minutes.
  • Once cool, wring out your sponge and allow it to dry before putting it to use again.


4. Dishwasher

Another kitchen appliance you can use to make sure you sponge is deep cleaned and sanitized is your dish washer. This is probably the most hands-off method of cleaning, so here’s how to put it to use:

  • Before you start your next dishwashing load, place your kitchen sponge on the top rack of the dishwasher.
  • Set your dishwasher to a long hot water cleaning cycle followed by a high-heat drying cycle.
  • After the drying cycle has finished, open up the dishwasher and allow everything to cool, including the sponge. Once cool, make sure the sponge is completely dry before starting to use it around your kitchen again.


5. Boiling Water


pot of boiling water in the kitchen


Need to clean and sanitize your kitchen sponge in a pinch? Here’s the easiest way to keep your sponge clean and sanitized for regular use:

  • Fill a pot with water and set it on the stove to boil.
  • Once the water has started to boil, place your sponge in the pot and allow it to boil with the water for about 5 minutes.
  • After you’ve allowed the sponge to heat up and boil in the water, turn off your stove’s burner and give the water time to cool.
  • When both the water and the sponge have cooled, take the sponge out of the water and wring it out. Allow the sponge to fully dry before using it again.


Tips & Tricks

No matter what method you decide to use to clean and disinfect your kitchen sponge, there are a few other things to keep in mind. Here’s what you should remember:

  • Kitchen sponges should be cleaned at least once a week and sanitized almost everyday, but they should also be replaced monthly when used regularly.
  • If your sponge has a metallic abrasive, do not place it in the microwave to clean or sanitize it. This can and will cause a fire within the microwave.
  • When using your sponge, try to avoid cleaning anything except your dishes with it. Using it around the kitchen as more than a dishwashing utensil can actually spread more germs and bacteria around the room. Instead of using your kitchen sponge to clean up and catch messes around the house, we highly recommend having a few spare microfiber cloths among your arsenal of cleaning supplies.

FAQs


Woman hand holding a cleaning sponge


How often should a sponge be cleaned and disinfected?

Kitchen sponges should be cleaned and disinfected at least once every week in order to decrease and even stop the spread of germs and bacteria around the kitchen.


How do you prolong the life of a sponge?

You can easily prolong the life of your sponges by storing them properly and allowing them to fully air dry above and away from your sink and also make sure that you are keeping your sponge clean and sanitized between uses.


Can you reuse kitchen sponges?

You can clean, sanitize, and reuse your kitchen sponge for several weeks before replacing it. Once your kitchen sponge has reached its limit after 2 or 3 weeks of use, it is time to replace it.


Are there alternatives to a sponge?

Scrubbers made of materials like bamboo and silicon are very common and well-loved sponge alternatives. Many also swear by Swedish dishcloths and wooden dish brushes.


Remember that even with regular cleaning, you’ll still need to replace that grubby old sponge after a few weeks. When you keep up with the cleaning around your kitchen, you’ll be on your way to a healthier and happier home. Do you have any other tips and tricks to share when it comes to keeping your kitchen clean? Leave a comment below and tell everyone about it! We love hearing your stories and sharing them with others.


If you’re looking for some help around the house, we’ve got you covered. We’re proud to offer a variety of services for homes of every size. We even offer apartment cleaning services in Chicago so you know we’ll be able to help any home. Contact us today to find out exactly how we can help you keep your home looking its very best.

The post How to Properly Clean Your Kitchen Sponge appeared first on Cleanzen.

from Cleanzen https://cleanzen.com/blog/how-to-clean-kitchen-sponge/
via IFTTT

from Cleanzen Cleaning Services https://cleanzencleaningservices0.blogspot.com/2023/04/how-to-properly-clean-your-kitchen.html
via IFTTT

from
https://cleanzencleaningservices0.wordpress.com/2023/04/12/how-to-properly-clean-your-kitchen-sponge/

from Gabriela Bragg https://gabrielabragg.blogspot.com/2023/04/how-to-properly-clean-your-kitchen.html
via IFTTT

from Gabriela Bragg https://gabrielabragg.wordpress.com/2023/04/12/how-to-properly-clean-your-kitchen-sponge/
via IFTTT

from Emilio Butler https://emiliobutler.blogspot.com/2023/04/how-to-properly-clean-your-kitchen.html
via IFTTT

from
https://emiliobutler.wordpress.com/2023/04/13/how-to-properly-clean-your-kitchen-sponge/

from Cindy Roberts https://cindyroberts0.blogspot.com/2023/04/how-to-properly-clean-your-kitchen.html
via IFTTT


from
https://cindyroberts00.wordpress.com/2023/04/13/how-to-properly-clean-your-kitchen-sponge/

Saturday 1 April 2023

Making Cleaning Eco-Friendly with Vinegar

Many cleaning products on the market right now are super effective against germs and bacteria but aren’t considered to be eco-friendly. Why sacrifice having a clean and germ-free home when you can’t use a product that is safe to use around your kids and pets? The answer is, you don’t have to, because there is already a super effective and safe product within your pantry: distilled white vinegar. If you’re wondering just what this product can do for you and your home, allow us to give you a few examples.

Why Clean with Vinegar?


White vinegar is an effective and powerful natural cleaner, degreaser, and even disinfectant. If you’re wondering how this super common household product could possibly be any kind of “miracle cleaner”, then sit tight because it’s time for some science. Vinegar is made from about 4-5% acetic acid, otherwise called ethanoic acid. Acetic acid is produced both naturally, by bacteria found in both food and water, as well as synthetically, like what is found in vinegar.


The acetic acid in vinegar is what gives it that pungent smell and makes it such an effective cleaning product. It can break down and dissolve most dirt, oil, grease, and grime. In fact, we recommend cleaning with vinegar to almost all of our clients. It works best for general household cleaning purposes on surfaces that can handle acidic products, so make sure you test small areas before cleaning if you aren’t sure.


Using Vinegar Around the House


Below, you’ll find a list of ways you can start to implement vinegar into your regular cleaning and disinfecting schedule. Plus, we’ll even explain what makes vinegar so effective and remind you why it’s such an incredible cleaning product to have on hand at all times. If you’re curious to see how you can start using vinegar around your home, keep reading!


1. Mop Linoleum & Tile Floors

When cleaning up around the house, you can never forget the floors. If you’re looking to clean and freshen up your floors in a more eco-friendly way, you can create a highly effective solution of a gallon of water and about ½ cup of white vinegar. Just keep in mind that this particular mix should only be used on ceramic tile and no-wax linoleum flooring, not wood or natural stone.


2. Leave Windows & Mirrors Streak-Free


A man Cleaning the windows at home


Streaky windows and mirrors can be the bane of our existence, this is almost a universal experience. Fortunately, we have just the solution to this problem. You can mix together a 2-to-1 solution of white vinegar and water to make the ultimate glass cleaner. You can also add a couple of drops of dish soap for extra cleaning power and a streak-free finish every time.


3. Clean & Deodorize Refrigerators

When it comes time to clean out your refrigerator and toss all those forgotten leftovers that got pushed to the very back, remember to be thorough. Use some vinegar when cleaning shelves and drawers and wiping up spills. You can even sprinkle a bit of baking soda to really scrub and deodorize while you clean. Vinegar is far safer to use around any food whether open or contained than most chemical cleaning products.


4. Freshen Dishwashers

Dishwashers can become overridden with musty odors after a while, especially if the filter hasn’t been cleaned out for a while. It happens to the best of us, so of course we have a solution for you. Simply add a cup of vinegar to the bottom of your dishwasher and run a regular cleaning cycle. The vinegar can double as a cleaner and a deodorizer to leave your dishwasher fresh and ready for another round.


5. Create an Eco-Friendly Air Freshener

Looking for a more natural and safe alternative to chemical air fresheners? We’ve got you covered. Mix half a teaspoon of vinegar with distilled water, plus a few drops of your favorite essential oil, in a spray bottle. Our favorite essential oils are lemon, eucalyptus, or tea tree but every home is different so tell us what kind of blends you come up with in the comments!


6. Clean & Disinfect Showers & Tubs


Woman cleaning the bath tub


Tubs and showers tend to catch and hold soap scum and hard water stains, plus they always need regular cleaning and disinfecting. To combat those pesky stains you can mix together water and vinegar, and maybe add a few drops of dish soap. Spray or wipe that mixture on the walls of your shower or tub and leave it to work for about 15 minutes then clean it away for a fresh start.


7. Descale Faucets & Showerheads

Sink faucets and showerheads can become clogged and lose their pressure over time thanks to mineral deposits and hard water build-up. You can fix this by adding some white vinegar into a plastic bag and then securing it with a rubber band. Be sure to add enough vinegar to cover the bottom of the faucet or showerhead completely. Leave the bag on for a few hours or overnight, then remove it and let the water run.


8. Disinfect & Deodorize Mattresses

If you’ve noticed a strange smell or a random stain on your mattress while changing the sheets, we have just the fix. Just mix vinegar, a little rubbing alcohol, and some tea tree essential oil in a spray bottle and spritz this on your mattress. This solution helps combat dust mites, mildew, and general odors. If you find your mattress needs some deeper deodorizing, sprinkle some baking soda on top of the spray. Let the spray settle and dry, and then vacuum the mattress surface.


9. Descale Coffee Makers & Kettles

If you’re anything like us, you can barely function without your daily caffeine fix. The only problem is the state of your coffee maker, when was the last time you cleaned that? The solution? Pour an even mix of water and vinegar directly into the kettle and run it through the coffee maker or simply boil the water in the kettle then rinse thoroughly with water. If you have an automatic coffee maker, you can run plain water through a few times to get the smell and taste of vinegar out..


10. Disinfect Countertops


Kitchen and bathroom countertops are high-traffic surfaces that require regular cleaning and disinfecting. When cleaning surfaces like kitchen counters, you need to make sure to use food-safe and eco-friendly cleaning products as using chemicals can risk contaminating future food preparations. Luckily, vinegar is the best solution to this particular problem as all you’ll need to do is dilute a spray bottle of vinegar with some water. You can use this specific mixture on most countertops, however, you should avoid using vinegar to clean marble and granite.


11. Clean & Degrease Cookware

Cooking mishaps happen to everyone and can leave even our most durable pots and pans with baked-on messes. The best course of action to save your cookware is with vinegar of course. Simply fill the offending cookware with a half-and-half solution of water and vinegar and then bring it to a boil on the stove. Allow this mix to boil for a few minutes before allowing it to cool and follow with a good scrub.


12. Clean & Disinfect Plastic Cutting Boards

If you’ve prepared any kind of raw meat within the last few days, hopefully, you did so on a plastic cutting board. Even if you haven’t been preparing meat, when was the last time you deep cleaned and disinfected your go-to cutting board? Take a moment to spray and wipe both sides thoroughly with an even mixture of vinegar and water and then wash the board before letting it air dry and putting it away.


13. Degreasing Ovens

Much like our beloved cookware, ovens and stovetops can accumulate grease and oil with regular use throughout the week. The best way to cut through this greasy grimey mess is, of course, with vinegar. Mix water and vinegar in a spray bottle and spray the solution around the surface of the cooktop. Give it 10 minutes to cut through all that stubborn grease and then wipe it away with some warm water and a sponge.


14. Boost & Deodorize Laundry

Our final tip to share is by far one of our favorites. Everyone loves the feeling of freshly washed and warm laundry, and it turns out vinegar is the key. Adding half a cup of vinegar to your next load can both preserve and brighten the colors of the laundry. You can also toss in a full cup of vinegar to a rinse cycle to be a more eco-friendly and effective fabric softener and static reducer. We’ve tried this and can promise that you’ll notice the difference and you’ll love the results!


15. Clear Cloudy Glasses


Dirty and clean glass cups on a kitchen sink.


Glassware can develop a cloudy appearance with time, even after running them through the dishwasher. This is almost always due to hard water deposits, or frequent wine drinking (we don’t judge!), but it can be easily remedied with a little bit of white vinegar. All your cloudy glassware needs is a brief soak in a tub of vinegar followed by a quick wash and buff with a soft microfiber cloth.


What to Avoid When Cleaning with Vinegar


While vinegar can be an incredible cleaning product to have on hand, there are a few things you should keep in mind before going after your whole house:

  • Vinegar can cause pitting on stainless steel, so we don’t recommend using it on kitchen knives or appliances without diluting it.
  • You should also avoid using vinegar when cleaning marble, granite, and other natural stone countertops or floors because it can very easily damage the finish and or leave the surface looking dull or scratched.
  • It’s also a good idea to avoid using vinegar to clean any electronic screens because it can damage the protective coating on devices and screens and make touch screens less effective.
  • Be careful cleaning any wood countertops and or untreated or unfinished hardwood floors as undiluted vinegar can damage these beyond repair.
  • As long as you keep these tips in mind, your home is well on its way to looking and smelling great.


FAQs


Will cleaning with vinegar leave a smell?

The bad news is that, yes, cleaning with vinegar can smell up your space, but the good news is that the smell of vinegar naturally dissipates after a few hours. In order to mask, or at least lessen the effects, of vinegar, we suggest both diluting it with water as well as adding a few drops of an essential oil like lemon or eucalyptus.


Can vinegar be used on all surfaces?

While safe to use on many surfaces to kill bacteria and clean, vinegar is not safe to use on natural stone, waxed wood, cast iron, or aluminum. This is because vinegar is about 5% acetic acid, which can harm some surfaces, so it is always recommended that you test it in an inconspicuous area before cleaning any surface.


How effective is vinegar against bacteria?

In most cases, vinegar does work as an effective disinfectant to some degree. However, it is not as effective against bacteria as bleach or other commercial cleaners. If you are looking to combat germs as effectively as possible, there may be other solutions you should try before reaching for vinegar.


Creating DIY disinfectant spray with eco friendly products


We hope you were able to learn more about the natural and eco-friendly cleaning and disinfecting capabilities of vinegar. Even if you just picked up a few new tips and tricks for cleaning around the house. Was there anything you knew already and use in your home? What other cleaning tips and tricks using vinegar have you tried around your home and become obsessed with? Tell us all about it in the comments below, we love hearing from you!


If you’re looking for some extra time and attention to detail around your home, but don’t want to sacrifice the desire for eco-friendly products, we’ve got you covered! We’re proud to offer eco-friendly products and services as the best house cleaners in Philadelphia. If you’re curious, check out our website and see for yourself. Contact us today and find out how we can help you keep your home looking and feeling amazing!

The post Making Cleaning Eco-Friendly with Vinegar appeared first on Cleanzen.

from Cleanzen https://cleanzen.com/blog/cleaning-with-vinegar/
via IFTTT

from Cleanzen Cleaning Services https://cleanzencleaningservices0.blogspot.com/2023/04/making-cleaning-eco-friendly-with.html
via IFTTT

from
https://cleanzencleaningservices0.wordpress.com/2023/04/01/making-cleaning-eco-friendly-with-vinegar-2/

from Gabriela Bragg https://gabrielabragg.blogspot.com/2023/04/making-cleaning-eco-friendly-with.html
via IFTTT

from Gabriela Bragg https://gabrielabragg.wordpress.com/2023/04/01/making-cleaning-eco-friendly-with-vinegar-2/
via IFTTT

from Emilio Butler https://emiliobutler.blogspot.com/2023/04/making-cleaning-eco-friendly-with.html
via IFTTT

from
https://emiliobutler.wordpress.com/2023/04/02/making-cleaning-eco-friendly-with-vinegar-2/

from Cindy Roberts https://cindyroberts0.blogspot.com/2023/04/making-cleaning-eco-friendly-with.html
via IFTTT


from
https://cindyroberts00.wordpress.com/2023/04/02/making-cleaning-eco-friendly-with-vinegar-2/

How to Get Oil Out of Clothes (Without Ruining Them!)

  A nice big bite of a juicy hamburger or hovering over a cooking pan without an apron can catch anyone by oily surprise, it happens to us...